Hosting chuyên nghiệp với nền tảng điện toán đám mây và công nghệ máy chủ thế hệ mới, đa dạng sự lựa chọn, thích hợp với nhiều nền tảng khác nhau nhưng đều được tối ưu hóa, mang lại tốc độ vượt trội, bền bỉ và an toàn dữ liệu.
CLOUD VPS với những gói dịch vụ duy nhất chỉ có tại 1Hosting đã được chuẩn hóa, tối ưu từ kinh nghiệm xây dựng, quản trị và vận hành các hệ thống tương tự.
1Hosting mong muốn bằng kinh nghiệm thực tế của mình đưa ra những giải pháp hữu hiệu giúp doanh nghiệp vừa và nhỏ ứng dụng CNTT vào hoạt động quản lý, sản xuất và kinh doanh.
Chia sẻ lợi nhuận, hợp tác thành công là mong muốn của 1Hosting. Hãy trở thành đối tác của chúng tôi để cùng phát triển.
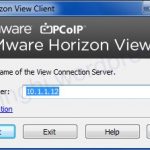
Ở phần trước chúng ta đã hoàn thành việc cài đặt các thành phần cơ bản của View với Linked Clone, và tất nhiên, 1 thành phần k thể thiếu, đó là source của os cần chạy VDI. Bài này ta sẽ thực hiện các bước chuẩn bị source OS (WIndows 7) dùng cho Linked Clone
Điều kiện đầu tiên để chuẩn bị chính là windows 7 :)), và phải là máy ảo trên host
Một vài câu hỏi trước khi chuẩn bị triển khai như sau:
Q: không phải là windows 7 được ko ?
A: được, và mỗi OS có cách chuẩn bị khác tí.
Q: tại sao phải là máy ảo ? máy thật k được à ?
A: ko chỉ là máy ảo, mà máy ảo còn phải được quản lý bởi vcenter được add vcomposer.
Q: bây giờ chỉ muốn làm source với máy thật thôi, được ko ?
A: được, nhưng lúc này sẽ k phải là VDI với Linked clone (Automated Pool) , View có hỗ trợ dạng VDI tới một máy thật, nó nằm trong mục tạo Manual Pool.
B1: Tạo VM và cài đặt Windows 7
B2: Sau khi cài windows 7 xong, tiến hành cài VMware Tools và cài các software cần thiết.
B3: Để windows có thể chạy “mượt” hơn thì nên optimize lại windows
Down file Prep Clients.rar , trong file Prep Clients có 2 file là PrepClientPM.bat (No Personal Management) và PrepClient.bat (With Personal Management) và ta sẽ chạy file PrepClient.bat

Lưu ý : khi chạy các bạn nên phải chuột chọn “Run as Administrator” để tránh lỗi phát sinh khi chạy script.
Sau khi chạy script thì giao diện sẽ trở về ….windows 95 :)) nhìn hơi xấu nhưng nó sẽ rất tối ưu khi chạy qua các thiết bị mobile ( các bạn vẫn có thể chỉnh lại giao diện aero cho nhìn đẹp hơn tí )
Đoạn scripts trên làm gì?
a. Sets screen saver to “Blank Screen”, enable after one minute, and password protects it.
b. Empties the internet cache.
c. Turns off RSS Feeds in Internet Explorer.
d. Disables Microsoft Action center.
e. Stops the “Welcome to Internet Explorer” Dialogue for new users.
f. Disables “Superfetch”.
g. Disables Windows update (Note: If you are not using linked clones you might want to remove this line);
reg ADD "HKEY_LOCAL_MACHINESOFTWAREPoliciesMicrosoftWindowsWindowsUpdateAU" /v NoAutoUpdate /t REG_DWORD /d 0x1 /f
h. Disables System Restore, and removes access to the restore options.
i. Sets the application log size to 10MB and allows it to overwrite events as needed.
j. Sets the system log size to 10MB and allows it to overwrite events as needed.
k. Sets the security log size to 10MB and allows it to overwrite events as needed.
l. Disables the Network Location Wizard.
m. Disables Crash Dump Logging.
n. Deleted files are instantly deleted, they do not go to the recycle bin (Stops the recycler file filling up with junk), to stop this remove this line.
reg ADD "HKEY_LOCAL_MACHINESOFTWAREMicrosoftWindowsCurrentVersionpoliciesExplorer" /v NoRecycleFiles /t REG_DWORD /d 0x1 /f
o. Enables Remote Desktop (RDP Connections) from all clients (the less secure option)
p. Disables Windows User Access control.
q. Disables Windows SideShow.
r. Disables the following services.
Bitlocker Drive Encryption Service ‘BDESVC’
Block Level Backup Engine Service ‘wbengine’
Diagnostic Policy Service ‘DPS’
Desktop Window Manager Session Manager Service ‘UxSms’
Disk Defragmenter Service ‘Defragsvc’
Home Group Listener Service ‘HomeGroupListener’
Home Group Service ‘HomeGroupProvider’
IP Helper Service ‘iphlpsvc’
Microsoft iSCSI Initiator Service ‘MSiSCSI’
Microsoft Software Shadow Copy Provider ‘swprv’
Client side Caching Service ‘CscService’
Secure Socket Tunnelling Protocol Service ‘SstpSvc’
Windows Security Center Service ‘wscsvc’
Simple Service Discovery Protocol Service ‘SSDPSRV’
ReadyBoost Service ‘SysMain’
Tablet Input Service ‘TabletInputService’
Themes Service ‘Themes’
Universal Plug and Play Service ‘upnphost’
Volume Snapshot Service ‘VSS’ (Note: NOT Disabled if using the Persona Management Batch File)
Windows Backup Service ‘SDRSVC’
Windows Defender Service ‘WinDefend’
Windows Error Reporting Service ‘WerSvc’
Windows Firewall Service ‘MpsSvc’
Windows Media Center Receiver Service ‘ehRecvr’
Windows Media Center Scheduler Service ‘ehSched’
Windows Search Service ‘WSearch’
Windows Update Service wuauserv’
Wireless LAN Service ‘Wlansvc’
Wireless Auto config Service ‘WwanSvc’
s. Sets Windows to show “Blank Screen” when booting instead of the Windows animation. “bcdedit /set BOOTUX disabled”.
t Remove all Shadow Copies, “vssadmin delete shadows /All /Quiet” (Note: NOTDisabled if using the Persona Management batch file).
u. Disables Hibernation “powercfg -H OFF”.
v. Disables the “Last accessed” timestamp for windows files “fsutil behavior set DisableLastAccess 1”.
w. Stops scheduled Windows Defragmentation (Note: In Linked clone environments this would expand all the delta disks and is a common ‘gotcha’).
x. Stops the registry backup which happens every 10 days.
y. Stops the scheduled Windows Defender tasks.
z. Stops the Windows System Assessment Tools (this gives your PC its ‘performance rating’ from 1 to 5).
Nếu không thích đoạn scripts trên, ta có thể sử dụng chương trình đồ họa sau, download tại đây:

B4: cài đặt View Agent.
View Agent cài đặt khá đơn giản qua vài bước, các bạn cứ Next tới khi hoàn tất ( vì các thuộc tính giữ mặc định là ok, k cần qtâm lắm )

B5: Trong máy win7, chọn Start > Run > Cmd > gõ: ipconfig /release
và trong settings cần eject tất cả CD/DVC và USB đang mount.
B6: Trên giao diện quản lý vSphere Web Client
Phải chuột trên máy Win7 > chọn Take SnapShot > điền thông tin cho SnapShot > OK